
Want to know all about the Godox AD300Pro portable flash strobe? You’ve come to the right place! Today we’re going to have a look at the Godox AD300Pro outdoor flash strobe from unboxing through to the review.
What’s Included

The Godox AD300Pro comes in a case, with the usual Godox catalogue and warranty card, as well as the AD300Pro manual inside the box.
The case is a zipper one, and it’s much the same as the Godox AD200Pro case.
Firstly there is the light stand bracket, which is a tilt bracket with a ¼ inch screw thread at the top.
There is also the AD300Pro charger and a WB300P battery. The AD300Pro itself is surprisingly small for a 300-watt flash once it’s removed from the case.
How to Set Up the Godox AD300Pro

Setup is quite simple with this portable flash strobe. You use the tilt bracket or light stand bracket that’s provided, and match the ¼ inch thread to the thread on the bottom of the flash. You can also mount it directly on to a tilt bracket as long as it has a ¼ inch thread.
To mount the flash, you use the locking wheels on the side of the bracket and twist it into place. There are little notches on the bracket that line up to the notches on the flash. When that’s secured, the light won’t wobble around when it’s on the bracket.
To put the bracket on a stand, unscrew the locking knob in the bottom of the bracket and mount it directly on a stand. There’s also a tilt knob on the bracket to control the angle of the light itself.
Physical Features of the Godox AD300 Pro

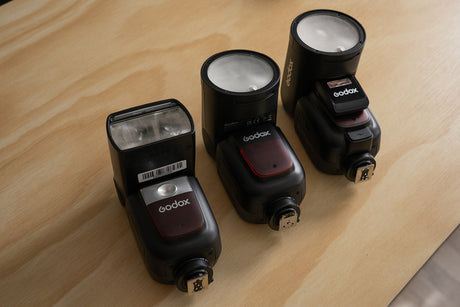
The size is one of the big differences with this flash, it’s very compact compared to some of the other Godox Witstro flashes (of which there is a large range). The AD300Pro sits between the AD200Pro and the AD400Pro, and it basically replaces the Godox AD360 and AD360ii, which have external battery packs.
The AD300Pro has a built-in lithium-ion battery, and all you need to do is slide the battery into the back and it locks into place. There’s also a locking release to get the battery out.
The WB300P battery is almost identical to the WB29 that comes with the AD200 or 200Pro, apart from some small differences in dimension. The AD300Pro is also backwards compatible with the AD200Pro batteries, so if you have a mixture of flashes then you can use your AD200Pro batteries in the AD300Pro.
On top of the Godox AD300Pro there is the IR sensor that’s for optical triggering, and then there’s the button and controls at the back of the flash.
Godox Mount

The locking release on the flash is at the front of the flash head, and there is a mounting bracket for Godox light modifiers and accessories. It doesn’t fit Bowens accessories, so you’ll have to buy some of Godox’s own accessories like their snoot, softboxes, or barn doors.
It’s good that Godox has added this built-in mounting bracket, because there’s no need to use optional Godox S or S2 brackets like you have to on the AD200 or 200Pro if you want to use Godox modifiers.
Round Flash Tube

The flash tube is at the front and is protected by a round cover, which is a bit different from the other flashes from the AD or Witstro range. The Godox AD300Pro has a round flash tube, which is similar to the studio strobes in the Godox range, like the SK400 or QT600.
The reason Godox did that is because they have a stronger LED modelling lamp at the front of the AD300Pro. The flash cover is basically to protect the flash when you’re transporting it or for safe storage, and it just clicks back into place.
The flash cover has a frosted glass front so that it diffuses the light on your subject if you are using just a standard reflector.
Umbrella Mount

At the bottom of the bracket there is an umbrella mount so you can add an umbrella light modifier if you wish.
Menu Options of the Godox AD300Pro

Let’s run through the menu and how to use the flash. Turn on the flash with the power button and there’s a small LCD screen that shows all the different settings, including the channel that you are on, the mode you’re on, battery life, the group, or if you’ve got beep mode on.
The mode button lets you cycle between multi, manual, and TTL modes, and you have a range of 1/256 to 1/1 which gives you lots of options as you can adjust power in 0.1 stop increments.
Menu Button
Then menu button is the one with three horizontal lines on it, and the F1 option controls the beep function. To turn it on and off, turn the wheel underneath the menu button, and you will see the status of the beep function change in the menu. The default setting is to have the beeper on.
F2 is slave mode so you can choose whether it’s going to be on if you’ve got other master flashes in the range.
F3 is your standby time, so you can choose when your flash turns off if it’s idle. You can turn it off completely if you want your flash on all the time, or you have a choice of leaving it on for 30, 60, or 90 minutes before it turns off.
F4 is the delay flash. You can set this delay all the way up to 30 seconds in half-second increments if you wish.
F5 is mask mode, which is also a feature of other Godox pro flashes. Set N1 or N2 for the masking modes.
F6 is the flash duration enabler. So if you want to display the flash duration you can set it on, then when you go back into the mode display it shows you a flash duration as you adjust the output on the flash.
F7 is where you set the channel wireless ID for the wireless channel in your flash trigger. If you’ve got other 2.4 gigahertz devices (especially Godox devices), it’s a good idea to set the wireless ID so it pairs perfectly with your trigger.
F8 is the last menu button, which is the colour stability mode. The flash is set to a rating of 5,600 Kelvin colour temperature with plus or minus 200 Kelvin. When you enable the colour stability mode, it decreases that range to plus or minus 100 Kelvin, so it makes it a lot more stable as far as consistent colour temperature is concerned.
Modelling Lamp Button
Underneath the Menu button is the modelling lamp button, which if you press that down and hold, it will show the settings for the modelling lamp. You can increase or decrease the intensity of the lamp by 10 stops. When you press down again, you can actually control the Kelvin of the modelling lamp in 500 Kelvin increments from 3000 to 6000 Kelvin.
Group/Channel Button
The GR/CH button on the right cycles through the group and channel buttons so when you press it down it changes the group, and when you hold it down it highlights the channel.
Next is the wireless mode, so you can turn off wireless completely if you want to use a sync cable, and then turn it back on when you want to use the flash wirelessly.
The red test flash button is next, and underneath that is the on/off button and the battery release button too.
Using Light Modifiers with the Godox AD300Pro

If you want to use Bowens modifiers with the AD300Pro, you would have to use a Bowens front mount which you can buy separately.
Or, you can buy the optional Godox S2 Bracket, which is the brand new version. To mount the S2, you remove the two small plates at the bottom and slip the flash directly into the middle and secure it on the silver plate at the front. It’s not advisable to mount the bracket on the plastic casing because it may damage the actual casing, especially with the extra weight of a light modifier.
With the S2 bracket, you can mount your Bowens modifiers, like softboxes and snoots, etc.

If you already have an AD400Pro you may be familiar with the adapter rings which allow you to adapt to different lighting modifier types on mounts. You can mount Profoto, Elinchrom, and Broncolor modifiers on to the AD400 and just screw them into the top with the adapter rings.
You can do the same thing with the AD300Pro using the same rings, but you need the AD-AB adapter ring. So, if you have already bought lighting modifiers from different flash systems, you can use them with the AD300Pro and the AD-AB adapter.

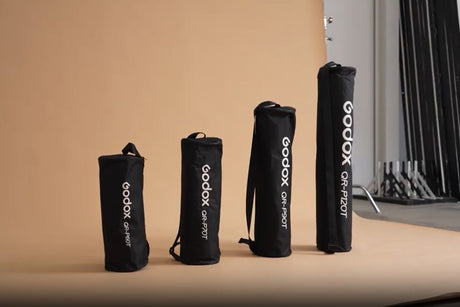
Godox modifiers that fit the AD300Pro include the Godox AD-S65S Softbox Modifier, which is a nice and compact silver-lined softbox that is easy to put up and pack away because it’s collapsible.
There’s also the Godox AD-S65W Softbox Modifier, which is a deep parabolic softbox lined in white with the same collapsible feature of the AD-S65S.

Conclusion

Overall, the AD300Pro is a great flash that sits in the middle of the Godox range, with a wattage of about 300 which is what you’d expect from a studio strobe.
The AD300Pro is an outdoor flash, and effectively replaces the AD360 and AD360ii. If you’re making the transition from speedlights into portable flashes or studio strobes, then the AD300Pro is a good choice.
It has all the pro features of the AD200, 400Pro, and 600Pro, and it’s compatible with all of the Godox X range of triggers. This also means it’s compatible with all kinds of main camera brands, so it has that versatility.
If you’re looking for a new flash, then the AD300Pro is a great flash to start with. If you already have some of Godox’s flashes, then the AD300Pro will work well as a backlight or hair light, or one that you just grab when you need that portable light.