
Do you want to become the next Ansel Adams? READ MORE!
There are some basic concepts of photography that all new photographers should take into consideration before starting their career. These include getting to know your camera, composition, lighting and timing. We have also included a few of our handy hints from mistakes we’ve made, so you don’t have to.
Once you’ve got these basics down pat, you are ready to go off into the world and crush it.
Get to Know Your Camera and Picking a Field
It’s time to pick a field of photography, whether it be Landscape, Portrait, Studio, Macro, Architecture, Nature or whatever else tickles your fancy. Knowing what style of photography you want to get into will help you decide what the right gear for you is. Before investing in a full set-up, it is essential to know what you need, so you aren’t wasting money on equipment you don’t need.
Firstly look for inspiration from your favourite photographers, see what they are using and what style appeals to you. For example, Architecture and Landscape photographers tend to use wide-angle lenses such as anything between 11-24mm where as Portrait photographers use longer focal lengths anything between 50-100mm.

Knowing your style will help direct you towards the right lenses and cameras you need. We recommend starting with one lens. For example, the kit lens that comes with most cameras. Once you are more confident, you can then invest in your next lens. We recommend your next lens should provide something your kit lens can’t for example higher apertures, focal lengths and if need be in-built image stabilisation.
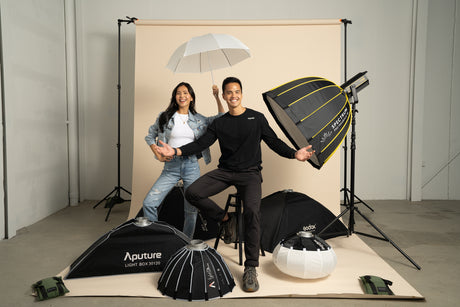
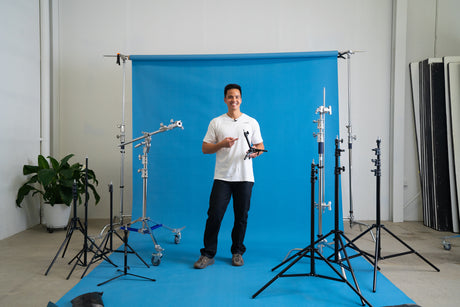
If studio photography is your calling, you will probably need to invest in some good lighting and backdrops to make your dreams come true.
Getting your new camera and lens may seem daunting but it’s something that all of us go through. The best way to overcome this fear is by non-stop shooting. Just go out, experiment and play around with your new camera.
Don’t be afraid to go on manual mode; there are plenty of YouTube tutorials and guides to help you navigate your way through all the buttons and dials. Or if you are daring enough, wing it and see what happens.
Composition is Key

The Rule of Thirds and the Golden Ratio are the most important principles to learn when it comes to composition. These are great guidelines to help you accurately compose your shot in the most visually pleasing way and create balance. Remember though that once you’ve learnt these rules, you can always experiment and break them.
A great tool to use when trying to nail the Rule of Thirds is using the grid function that is inbuilt into most cameras; it can help you properly compose your shot easily. Don’t stress if you don’t nail it in camera you can always fix up in post.
Creating leading lines in your shot and directing focus down the centre is also a great way to create interest and make your shots more dynamic. Leading lines direct viewers eyes around the image and can be used to draw attention to certain elements of the shot.
Light Source

Lighting is arguably the most essential element of photography. Whether you use natural or studio lighting, it is critical to use whatever you have to your advantage.
Regarding natural light, the Australian sun one of the harshest during summer compared to almost everywhere else around the world. So finding locations to shoot can prove quite the task. Here are a few tips to help defeat this beast, known as the sun.
- Shoot earlier or later in the day during Blue Hour or Golden Hour, at this time, the sun is not too harsh, creating a softer light on your subject. Shooting at these times also allows you to be more creative with your shots, such as backlighting your subject or using the long shadows that the subject is casting can create quite a funky shot.
- Look for shade. It’s your friend! Although shooting in the shade may seem like the opposite of finding light. In actuality, these shady areas provide even lighting by both blocking the harsh light but also letting in enough reflected light to illuminate your subject. Good places would be under trees, or in the shade cast by a wall!
- The last tip would be to use a scrim. If there isn’t any shade and the sun is glaring down, then it is an excellent option for diffusing the harsh sunlight.
Timing is Everything

It’s important not to rush your shots, find your frame and then wait for something to happen instead of forcing the shot. Good things come to those who wait.
For example, it’s sunrise at Bondi, and there is a nice patch of light casting in the water, instead of moving around and trying to force a shot, wait for a surfer to position themselves into the light and then take the shot.
Don’t stress about the things that are out of your control, let the shot unfold in front of you and then capture it.
Always Be Prepared
Now that you have your photography basics sorted there are a few tips we have before going out into the professional world.
- Always have two fully charged batteries ready to go.
- Keep a spare SD card handy just in case you just can’t stop shooting.
- Always back up your images after every shoot to ensure you don’t lose all your hard work. We also advise backing up twice on two separate devices (just to be safe).
- Keep your gear clean and ready to shoot with at all times.
- If you know your location before shooting, we suggest sussing out the area beforehand and knowing when the best time of day and best spots to shoot are.
- Continue to keep learning because there is always more to learn when it comes to photography.
We want to see what you create! Tag #hypopfeatures we’d love to see how you are using our handy hints. Catch you on the flip side.